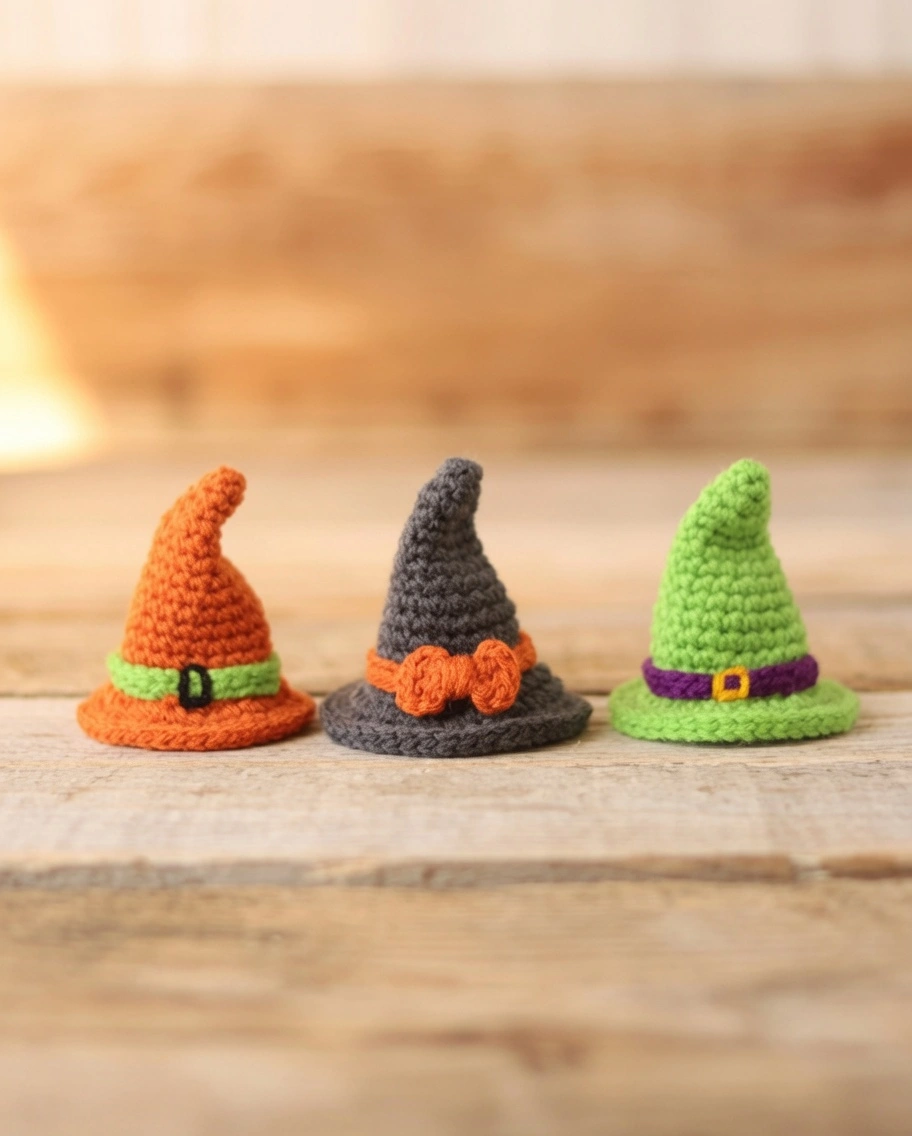
As the leaves begin to turn and the evening air takes on a crisp chill, our crochet hooks naturally gravitate toward cozy, festive projects. The Small Crochet Witch Hat is the ultimate quick, beginner-friendly way to use up those leftover scraps of worsted weight yarn. It’s an incredibly versatile little make that serves as the perfect accessory for decorating gift bags, creating imaginative play props, or stringing together as a spooky Halloween garland.
Because it works up in under an hour, it is the ideal project to transition your crafting habits from easy summer scallop crochet tank tops to full-blown fall mode. This pattern is highly approachable for beginners but engaging enough for seasoned crocheters looking for a relaxing, stash-busting weekend project. With endless color combinations and customizable finishing options, you can easily whip up an entire coven of these adorable hats in a single afternoon.
Materials Needed
- Yarn: Red Heart Super Saver Yarn (worsted 4-Medium, 100% acrylic)
- Color (A) Hat Color: approx. 12 yds/11 m
- Color (B) Band Color: approx. 4 yds/4 m
- Color (C) Buckle Color: a scrap piece
- Colors Used in Sample: Black, Carrot, Charcoal, Dark Orchid, Gold, Spring Green
- Crochet Hook: Size E/4 (3.5 mm)
- Stitch Marker(s): To keep your place in continuous rounds
- Tapestry Needle: For weaving in ends and hand embroidery
- Scissors
- Dritz Disc Needle Pullers: (optional, but helpful for tight stitches)
Abbreviations Used
- ch – chain
- FLO – work in the front loop only
- invisible finish – a technique to seamlessly end a round
- magic circle/adjustable ring – a starting technique for working in the round
- Rnd(s) – round(s)
- sc – single crochet
- sl st – slip stitch
- st(s) – stitch(es)
- [ ] / ( ) – work instructions between brackets/parenthesis as many times as directed
This pattern uses USA crochet terminology
Pattern Instructions
Main Hat
The Hat is made from the top down to the brim. Using Color (A) – a color desired for the hat
Rnd 1: 6sc in an adjustable (magic) circle. (6sts)
Rnd 1 alternative: If preferred, ch 2 and then 6sc in 2nd chain from hook. (6sts)
Rnd 2: Sc in each st around. (6sts)
Rnd 3: [Sc in the next st, 2sc in the next st] 3 times. (9sts)
Rnd 4: Sc in each st around. (9sts)
Rnd 5: Sc in the next st, 2sc in the next st, [sc in the next 2sts, 2sc in the next st] 2 times, sc in the next st. (12sts)
Rnd 6: Sc in each st around. (12sts)
Rnd 7: [Sc in the next 3sts, 2sc in the next st] 3 times. (15sts)
Rnd 8: Sc in each st around. (15sts)
Rnd 9: Sc in the next 2sts, 2sc in the next st, [sc in the next 4sts, 2sc in the next st] 2 times, sc in the next 2sts. (18sts)
Rnd 10: Sc in each st around. (18sts)
Rnd 11: [Sc in the next 5sts, 2sc in the next st] 3 times. (21sts)
Rnd 12: Sc in each st around. (21sts)
Rnd 13: Sc in the next 3sts, 2sc in the next st, [sc in the next 6sts, 2sc in the next st] 2 times, sc in the next 3sts. (24sts)
Rnd 14: Sc in each st around. (24sts)
In the next Rnds, the brim is added to the hat.
Rnd 15: Working in the FLO: [Sc in the next 3sts, 2sc in the next st] 6 times. (30sts)
Rnd 16: Sc in the next 2sts, 2sc in the next st, [sc in the next 4sts, 2sc in the next st] 5 times, sc in the next 2sts. (36sts)
Rnd 17: [Sc in the next 5sts, 2sc in the next st] 6 times. (42sts)
Rnd 18: Sl st in each st around. (42sts)
Fasten off using the invisible finish and weave in the ends.
Hat Band
Using Color (B) – a color desired for the hat band.
Ch 24
Rnd 1: Sl st to the first st to form a ring (Make sure that it’s not twisted and that it sits well just above the brim. Make adjustments to the ch length if needed), sl st in each st around. (24sts)
Leaving a long tail for securing the hat band to the hat, fasten off using the invisible finish. Weave in the starting tail.
Place the band on the hat and using the finishing tail invisibly tack the hat band in place so that it cannot be removed.
Buckle
Using Color (C) – a color desired for the buckle.
Using a length of yarn and a tapestry needle, hand stitch a square on the front center of the hat over the top of the hat band, the length and height of about 1 stitch length.
Additional Options for the Small Crochet Witch Hat
1. Replace the Buckle with a Bow
Using a desired color (used approx. 3 yds/3 m)
Ch 4, [dc in the 4th ch from the hook] 2 times, ch 3, sl st in the same st, ch 4, [dc in the 4th ch from the hook] 2 times, ch 3, sl st in the same st.
Fasten off leaving a long tail for wrapping several times around the middle and for securing the bow to the project. Weave in the starting tail.
Wrap the center of the bow as many times as desired. Then, using a tapestry needle make several sts at the back of the bow to secure the wraps.
Add the bow to the project.
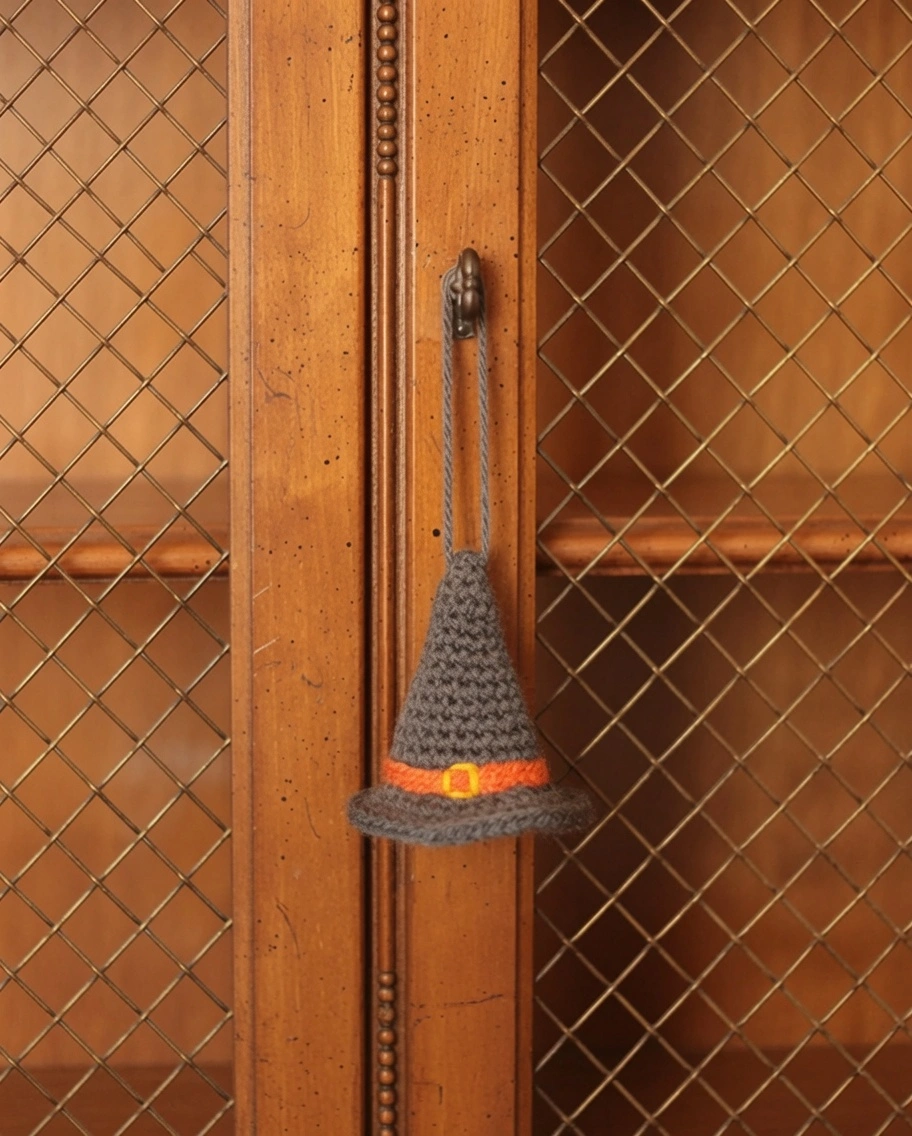
2. Turn the Small Crochet Witch Hat into an Ornament
Cut a length of yarn (or ribbon) long enough to create a loop for hanging. Using a tapestry needle, thread one end into the top of the Small Crochet Witch Hat, remove the needle, and knot the two ends together. Turn the loop until the knot hides inside the hat.
Styling Your Witch Hats
One of the best things about this mini witch hat pattern is how incredibly adaptable it is for both decor and wearables. If you want to dress up as a modern, cozy witch for a Halloween party, pairing this hat with an easy off-the-shoulder crochet crop top gives the perfect subtle costume vibe without going overboard.
For chillier trick-or-treating nights, you can throw on a fluffy mohair sweater and simply pin the mini hat to your lapel as a magical brooch. If you love making trendy, quick accessories to match your holiday wardrobe, you might also enjoy whipping up a chunky crochet tie top or an everyday crochet sweater vest pattern to wear underneath your festive layers.
Beyond wearing them, these little hats are phenomenal for decorating. You can glue them onto small pumpkins, stack them on a mantel, or use them to top handmade crochet gnomes and stuffed animals for an interactive, magical display.
Tips
- Maintain Tight Tension: Because you are working with a small hook (3.5 mm) and single crochets, keeping a tight and even tension is vital. If your tension is too loose, the stuffing (if you choose to lightly stuff the brim for structure) will show through the holes.
- Master the Invisible Finish: The invisible finish is used multiple times in this pattern (at the end of the hat and the band). Taking the extra minute to execute this technique rather than just doing a standard slip stitch join will give your hat a highly polished, professional look with no visible seam or awkward bump.
- Customize Your Colors: Don’t feel boxed in by traditional Halloween colors! A pastel witch hat is incredibly trendy right now. Try using a soft pink hat with a white band and a gold buckle for a “Good Witch” aesthetic, or go neon for an 80s retro spooky vibe.
FAQ
How big is the finished witch hat? Using the suggested 3.5 mm hook and worsted weight yarn, the finished Small Crochet Witch Hat measures approximately 3 inches (7.6 cm) tall, with the brim being approximately 8 inches (20 cm) in circumference.
Can I use a different brand of yarn? Absolutely. Any brand of worsted weight acrylic yarn should work beautifully. If you prefer a stiffer hat, a worsted cotton yarn is also a fantastic choice. Just keep in mind that due to slight variations in yarn thickness between brands, your finished size may vary slightly.
Do I need to use a stitch marker? Yes, highly recommended! Because the main hat is worked in continuous rounds, it is very easy to lose your starting point. Placing a stitch marker in the first stitch of each round and moving it up as you go will save you from having to constantly count your stitches to see where the round began.
Can I make the hat bigger? While this specific pattern is written to be a mini hat, you can easily size it up. To do this, simply continue the established increase pattern (adding one more single crochet between each increase in every other round) until the hat base reaches your desired diameter, then work even rounds until the hat is as tall as you want it before starting the brim.
Conclusion
Congratulations on creating your Small Crochet Witch Hat! This quick, stash-busting pattern is incredibly special because of its endless versatility for both festive home decor and wearable accessories. Share your finished witchy creation in the comments below!