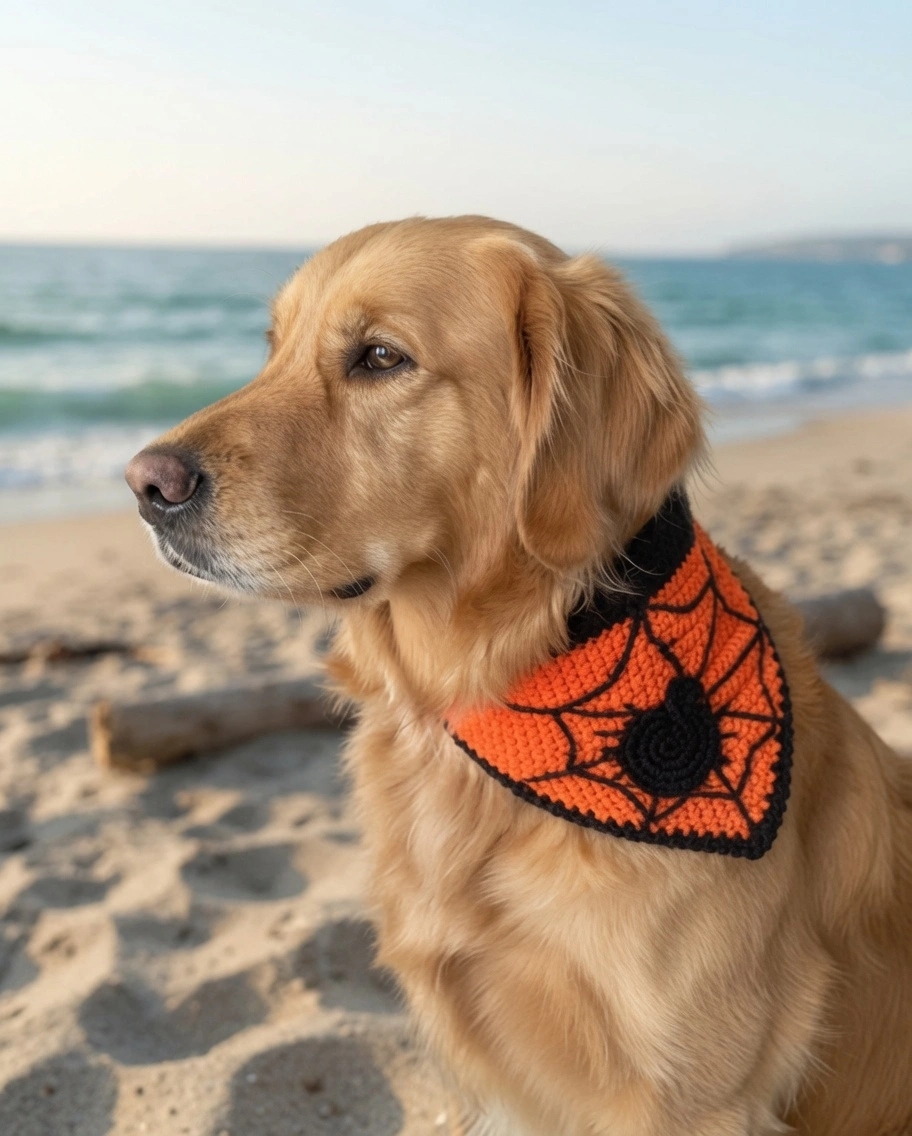
Dressing up your furry best friend for Halloween is one of the best parts of the spooky season, but full costumes can sometimes be uncomfortable for pets. This free crochet Halloween dog bandana pattern offers the perfect solution, ensuring a fun and festive look while keeping your dog completely comfortable and stylish.
Dogs look extra adorable when they wear something special, and this lovely little scarf features classic Halloween colors and a cute spider motif. This pattern is highly customizable, meaning you can easily adjust the starting chain to fit small puppies or large breed dogs perfectly. It is a fantastic, approachable project for beginners and advanced beginners alike who want to include their pets in the Halloween celebrations.
Materials Needed
- Worsted weight (medium #4) acrylic yarn:
- Black (main neck/border, web, and spider base)
- Orange (body of bandana)
- 5.5 mm crochet hook
- Yarn needle
- Stitch marker
- Scissors
- Button (¾”–⅞”, or Velcro as alternative)
- Optional: Safety eyes or yarn scrap for spider
Abbreviations Used
- ch = chain
- sc = single crochet
- dec = single crochet decrease
- sl st = slip stitch
- st(s) = stitch(es)
This pattern uses USA crochet terminology
Special Stitches
Single Crochet Decrease (sc dec): Insert hook into next stitch, pull up loop, insert into next stitch, pull up loop, yarn over and pull through all three loops.
Pattern Instructions
Bandana size is fully customizable: Make your starting chain the length needed for your dog’s neck (include overlap for closure). Pattern is written for a 16-inch collar using a starting chain of 60 (adjust as needed).
Bandana Base
1. Measure & Chain: Lay out your dog’s collar and measure. For a 16″ neck, chain 60 (or your required length). With black yarn, ch 60 (or as needed for the desired neck size), plus ch 1 (turning chain).
2. Row 1: Sc in each chain (beginning in the 2nd ch from hook). You should have 60 sc (or your number).
3. Row 2: Ch 1, turn. Sc in each st across.
4. Row 3 (Buttonhole Row): Ch 1, turn. Sc in first st, ch 1 (buttonhole), skip 1 st, sc in next st. Continue sc in each st across.
5. Rows 4–5: Ch 1, turn. Sc in each st across. (Remember: in Row 4, work 1 sc into the ch-1 space to maintain stitch count.) After Row 5, in last st: insert hook, bring up a loop with black, finish st with orange. Cut black, tie off, secure orange.
6. Rows 6–7: Work 2 rows in orange: Ch 1, turn. Sc in each st across.
7. Decrease Rows (Create the Point): Switch to shaping in orange.
Repeat the following step for each row:
Ch 1, turn. Skip first sc (beginning decrease), sc in each st until 2 remain, skip next-to-last sc (ending decrease), sc in last st. Each decrease row removes 2 sc. Repeat decrease rows, working back and forth, until only 2 sc remain at point.
Last row: ch 1, turn, skip first, sc in last. Fasten off.
Border
1. Attach Black Yarn: Begin at the top corner. Join black yarn with sl st; ch 1. Work 1 sc in each st along the top edge. Work down the angled side with evenly spaced sc (aim for 1 sc per row), to the point.
2. At Point: 3 sc into point to round the corner.
3. Work Up Other Side: Continue with evenly spaced sc up the next side to the top corner.
4. Second Border Round (Optional): Ch 1, turn. Sc in each sc around entire bandana, working 3 sc in the point again.
5. Fasten off and weave in all ends.
Surface Spider Web
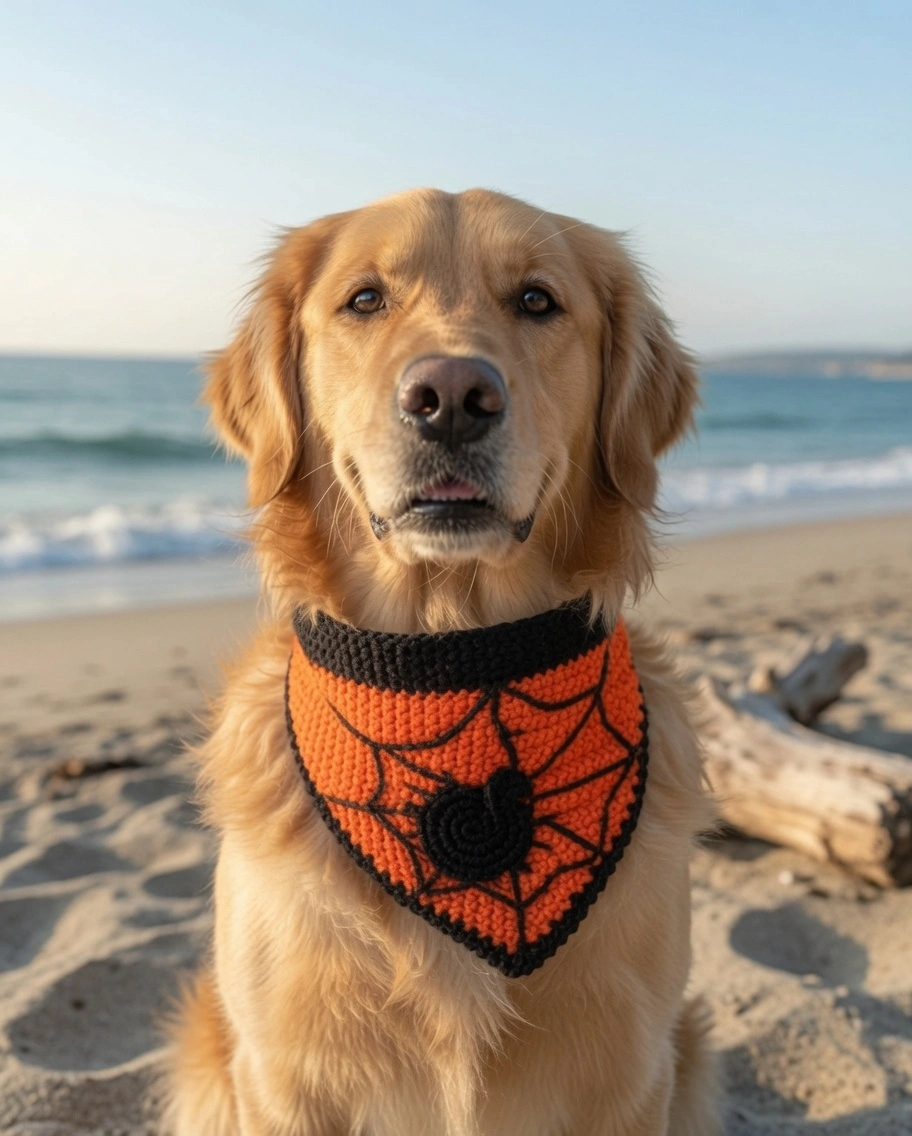
1. Find bandana center. With black or orange yarn and yarn needle, surface-stitch a vertical line from collar to point, leaving a long tail to secure at back. Continue working lines: Vertical, horizontal, and two diagonals each way (total 8 radiating lines). Add curved sections between lines to create a web by stitching the yarn over the radiating lines, securing each “curve” with a tacking stitch.
Spider Appliqué
Spider Head (smaller circle): With black yarn (or color for demo): Make a slip knot, ch 2. 6 sc in 2nd ch from hook. Place marker in first st. (2 sc in each st around) to 12 sc. (1 sc, 2 sc in next st) repeat around to 18 sc. Fasten off, leaving long tail for sewing.
Spider Body (larger circle): Make as for the head, but after reaching 18 sc: (2 sc, 2 sc in next st) repeat around. (1, 1, 2)—repeat to 24 sc for a larger body. Fasten off, leaving long tail for sewing.
Assembly: Stitch head overlapping body at the top. With black yarn, embroider 8 legs (4 on each side). Sew or stick 2 safety eyes (or embroider with yarn) on the head.
Finishing and Closure
Sew button on end opposite buttonhole at collar edge. If preferred, use Velcro or snap instead. Weave in all loose ends securely.
Tips
Because this bandana is worn by a pet, the most important tip is to weave in all your ends incredibly securely so your dog cannot chew on them. When working your single crochet decrease rows to create the point, try to keep your tension consistent so the triangle shapes up symmetrically.
If you love making holiday crochet accessories, this bandana pairs perfectly with other spooky decor. You can make a Free Crochet Witch Hat Pattern for yourself to match your dog, or create a Small Crochet Witch Hat for a child’s costume. For more fun Halloween props and decor, check out this Mini Potion Bottle Crochet Pattern to decorate your home!
FAQ
How do I know how many chains to make for my dog? The best method is to take a soft measuring tape and measure directly around your dog’s neck where a collar would sit. Add about 2 to 3 inches to that measurement to allow for the button overlap, and that is your starting chain number!
Can I use Velcro instead of a button? Absolutely. In fact, many pet owners prefer Velcro or a breakaway snap closure because it is much safer for active dogs. If the bandana gets caught on a branch or furniture, Velcro will simply pull apart.
What if my spider web looks messy? Surface crocheting takes a little bit of practice to keep the tension tight against the fabric. If your web looks loose, gently pull on the starting tail and the ending tail to tighten the radiating lines before securing them on the back of the bandana.
Conclusion
Congratulations on finishing your Halloween dog bandana! This adorable, customizable accessory is the perfect way to include your furry friend in the festive fun. Share a photo of your pet wearing it in the comments below!