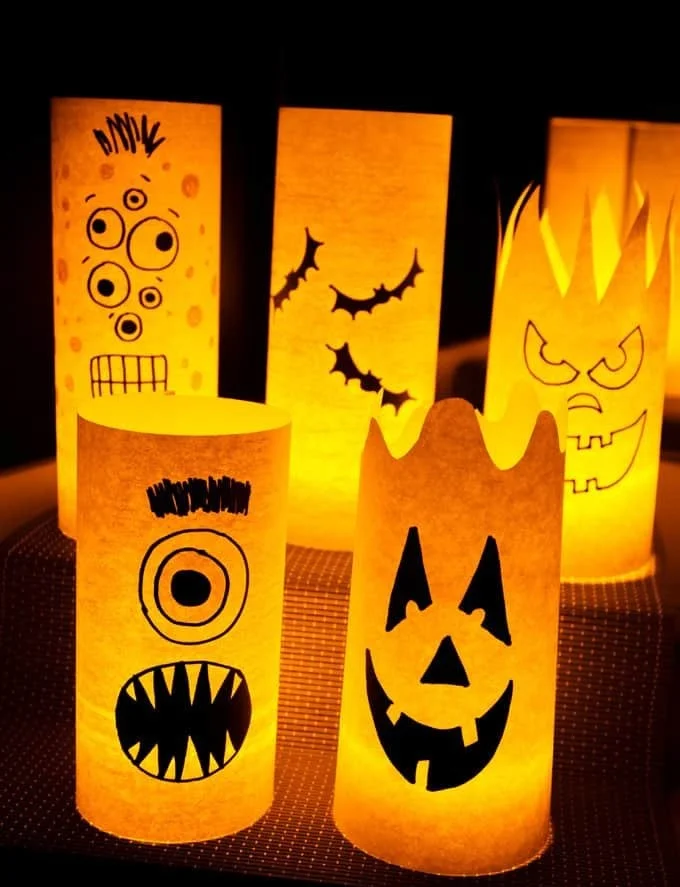
Creating charming and spooky Paper Halloween Luminaries is an enjoyable and easy DIY project that adds a magical touch to your Halloween festivities. With minimal materials and simple instructions, this craft is perfect for beginners looking to indulge in some creative DIY ideas. Not only do these luminaries brighten up your indoor space, but they also make delightful decorations for outdoor parties or trick-or-treat events. Follow this guide, and you’ll have a beautiful DIY home decor piece in no time!
WHY YOU WILL LOVE THIS Paper Halloween Luminaries
Making Paper Halloween Luminaries is a fantastic way to embrace the creative spirit of Halloween. You will enjoy this craft for several reasons:
- Easy for Beginners: The step-by-step instructions make this craft approachable for those new to DIY.
- Uses Simple Materials: The luminaries require just a few basic supplies that are easy to find.
- Budget-Friendly: This project is inexpensive, allowing you to create multiple luminaries without breaking the bank.
- Quick to Make: You can complete this craft in about an hour, perfect for those last-minute decorating sessions.
- Great for Home Decor: These luminaries can enhance your home’s spooky ambiance.
- Creative DIY Project: You can personalize them to fit your taste or theme.
- Seasonal Crafts: They are perfect for Halloween but can be adapted for other celebrations, making them versatile.
PROJECT DETAILS
Skill Level
Beginner: This project is ideal for those just starting in the crafting world.
Estimated Time
One hour: You can craft a beautiful luminary in about 60 minutes.
Approximate Cost
$10-$15: The materials are affordable, making this a budget-friendly DIY.
Best For
Home Decor and Seasonal Decorating: Use them for Halloween gatherings, indoor decorations, or outdoor parties.
Project Type
Easy Craft: This project fits into the category of simple crafts that anyone can try.
TOOLS AND EQUIPMENT NEEDED
Craft Knife
Used to cut the paper designs precisely. A sharp blade will help achieve clean cuts.
Cutting Mat
Protects your work surface when using a craft knife.
Ruler
Helps ensure straight cuts and is useful for measuring sections of paper.
Pencil
For drawing design templates on the paper before cutting.
MATERIALS
Clear Plastic Jars
These serve as the base for your luminaries. They can be reused or upcycled containers from your kitchen.
Frosted Glass Spray Paint
Gives a lovely frosted look to the jars, creating a glowing effect when a candle is placed inside.
Black Construction Paper
Used for cut-out shapes to create spooky designs for your luminary.
Adhesive
A glue stick or spray adhesive works best to attach the cut-outs to the jars.
Battery-operated Tealight Candles
This is a safe option to illuminate your luminary without any fire risk.
Decorative Ribbons (Optional)
Add a personal touch by wrapping ribbons around the luminaries.
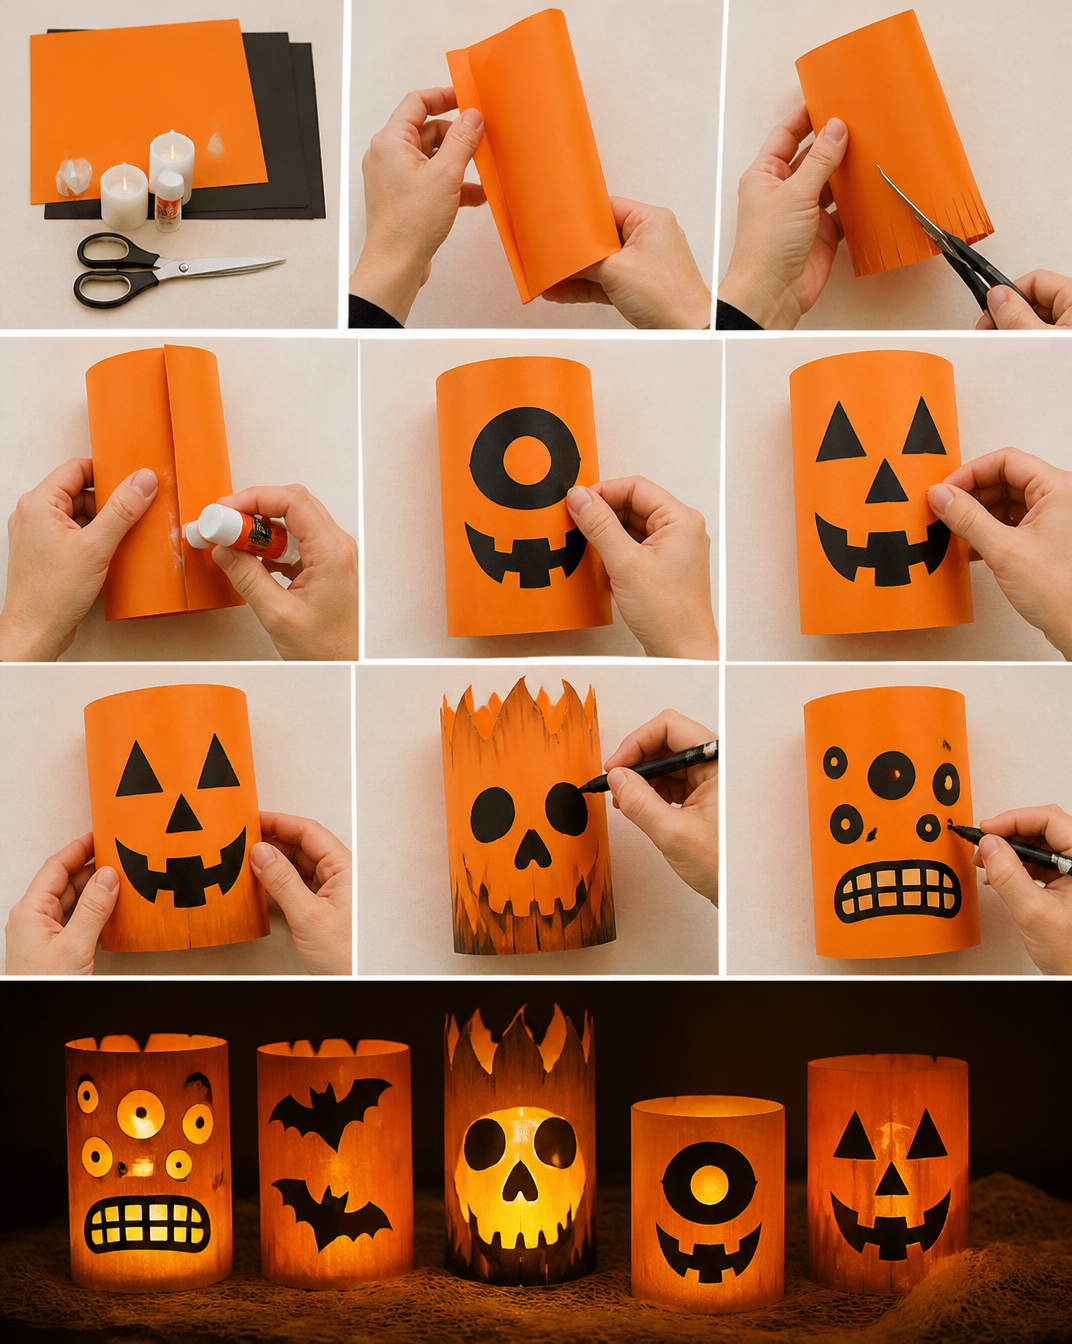
HOW TO MAKE Paper Halloween Luminaries
Step 1: Prepare Your Jars
Clean the clear plastic jars and remove any labels. Make sure they are dry for the next steps.
Step 2: Create Your Designs
Use a pencil to sketch spooky designs on the black construction paper. This can include ghosts, pumpkins, bats, or any Halloween symbol you like.
Step 3: Cut the Shapes
Carefully cut out the designs using your craft knife and cutting mat. Take your time to ensure the shapes are neat and clear.
Step 4: Attach the Designs
Using your adhesive, attach the cut-out shapes to the jars. Place them around the jar for a 3D effect. Ensure they are well-glued to prevent them from peeling off later.
Step 5: Spray Paint the Jars
In a well-ventilated area, spray a thin layer of frosted glass spray paint on the outside of the jar. Hold the can about 6-8 inches away and make even strokes. Let it dry completely.
Step 6: Insert the Tealights
Once the paint is dry, place the battery-operated tealight candles inside the jars. Turn them on, and watch your designs come to life with a warm glow.
Step 7: (Optional) Add Ribbons
If you’d like, use decorative ribbons to wrap around the tops of the jars for extra flair.
TIPS AND TRICKS
- Choosing Materials: Use clear plastic jars for safety with the tealight candles. If you choose glass, make sure to handle them carefully.
- Cutting Shapes: Use a sharp craft knife for clean edges. Practice on scrap paper if necessary.
- Avoiding Common Mistakes: Ensure the adhesive is dry before spraying the paint to prevent smudging.
- Getting a Better Finish: Apply a second coat of frosted paint if the look isn’t as opaque as you want.
- Making the Craft Last Longer: Store the luminaries in a cool, dry place if using traditional materials.
- Working Safely: Always supervise children when using sharp tools or spray paints.
VARIATIONS AND CUSTOMIZATION IDEAS
- Different Colors: Use different colors of construction paper for a more vibrant display.
- Different Sizes: Create luminaries in various jar sizes for a dynamic group display.
- Seasonal Versions: Change up the designs for other holidays like Christmas or Thanksgiving.
- Different Patterns: Instead of spooky, try floral or geometric patterns for a different look.
- Personalized Versions: Include names or special messages to be used as gifts or party favors.
Paper Halloween Luminaries FAQ
Q1: Is this project difficult to do?
No, this is a beginner-friendly craft that anyone can make.
Q2: What type of materials do I need?
You will need clear plastic jars, black construction paper, adhesive, and tealight candles to complete this project.
Q3: How long does it take to make the luminaries?
You can expect to spend about one hour on this project from start to finish.
Q4: Can I store these luminaries after Halloween?
Yes, if made with appropriate materials, you can store them in a cool, dry place for years to come.
Q5: Are there any safety considerations?
Using battery-operated tealights eliminates fire risks, making this a safe craft choice. Always supervise children when crafting.
CONCLUSION
Creating Paper Halloween Luminaries is an easy and budget-friendly DIY project that transforms simple materials into stylish home decor. Perfect for beginners, this craft offers a quick, creative outlet for Halloween celebrations. Whether you display them at home or gift them to a friend, these luminaries are sure to illuminate your festive spirit. Grab your supplies and start crafting today! Share your finished project or customization ideas with us to inspire others on their DIY journey.