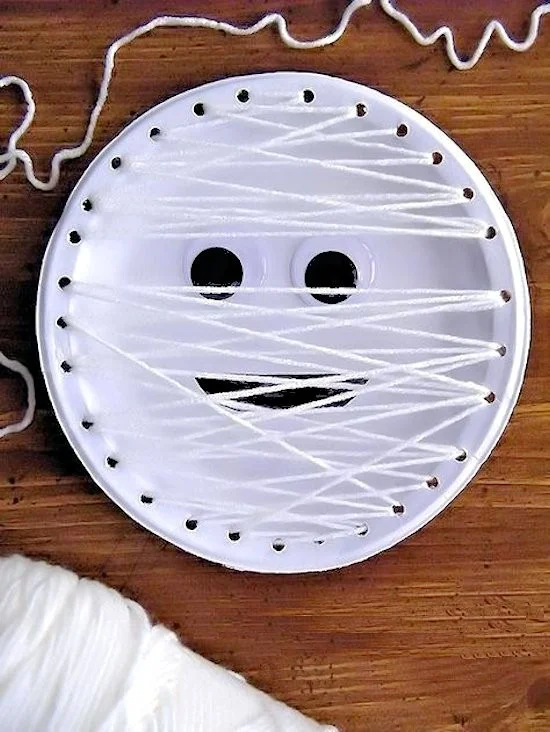
The Mummy Paper Plate Lacing Craft is an easy DIY project that is perfect for Halloween or any time you want to add a fun, spooky touch to your decor. This craft uses simple materials, making it accessible for beginners and children alike. By transforming plain paper plates into adorable mummies with just a few supplies, you’ll not only engage creativity but also enjoy a budget-friendly way to create handmade decorations. This seasonal craft is great for family activities, school projects, or even as DIY decorations for parties.
WHY YOU WILL LOVE THIS Mummy Paper Plate Lacing Craft
This Mummy Paper Plate Lacing Craft is a fantastic way to celebrate the spooky season while enjoying a fun and engaging DIY experience.
- Easy for beginners: This craft requires minimal skills, making it perfect for families with children or even for adults looking for simple crafts.
- Uses simple materials: You can find most of the materials around your home, allowing for a stress-free crafting session.
- Budget-friendly: With such low-cost materials, this project won’t break the bank.
- Quick to make: You can complete this craft in just a short time, making it a great option for busy schedules.
- Great for home decor: Once finished, you can display these cute mummies around your house to get into the Halloween spirit.
- Easy to customize: You can adjust the colors, add different decorations, and even create variations of the mummies.
PROJECT DETAILS
Skill Level
This project is beginner-friendly, making it an excellent choice for kids and adults alike. The steps are simple and easy to follow.
Estimated Time
You can complete this project in about 30 minutes to an hour, depending on your crafting speed and the age of the children involved.
Approximate Cost
The total cost for this craft is approximately $5 to $10, depending on whether you have some materials at home.
Best For
This craft is perfect for children’s activities, Halloween celebrations, or family crafting time.
Project Type
This is a simple craft that fits into the category of seasonal crafts, home decorations, and beginner-friendly projects.
TOOLS AND EQUIPMENT NEEDED
Scissors
Scissors are needed to cut the paper plates into shape and to trim any fabric or yarn. Make sure to use child-safe scissors if little hands are involved.
Glue
Regular white glue or a glue stick will work for this project to adhere fabric or yarn to the paper plates.
Hole Puncher
A hole puncher is used to create holes for the lacing. This is an essential tool for making the lacing holes evenly spaced.
MATERIALS
Paper Plates
These will serve as the base for your mummy. They are sturdy and easy to work with, making them perfect for crafting.
White Yarn or Bandages
You can use white yarn or torn strips of white fabric or gauze to create the mummy’s wrappings. This adds texture and enhances the spooky effect.
Googly Eyes
Googly eyes will give your mummies a fun and friendly appearance. You can choose the size based on how cute or spooky you want them to look.
Black Marker (optional)
A black marker can be used to add additional features, like a mouth, to your mummies.
Colored Paper (optional)
If you’d like to add background colors or different decorations to your mummies, colored paper can help enhance your project.
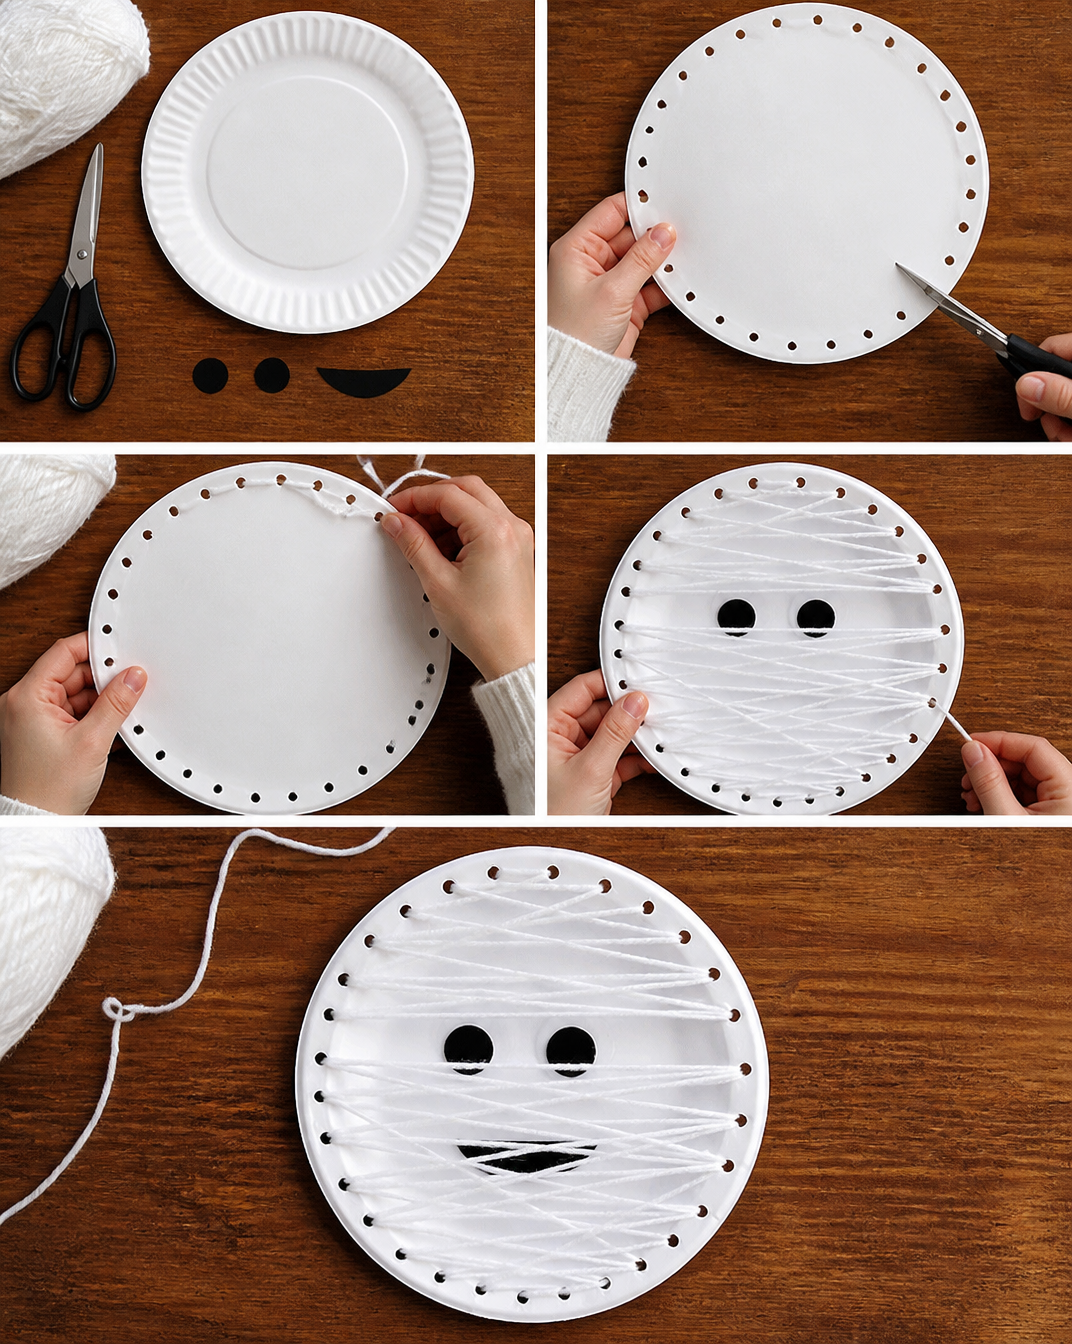
HOW TO MAKE Mummy Paper Plate Lacing Craft
Now that we have everything set up let’s dive into the steps to create your spooky mummy.
Step 1: Prepare Your Paper Plates
Start by placing your paper plate upside down. This will be the back of the mummy, so it must be completely clean and intact.
Step 2: Punch Holes
Using the hole puncher, create holes around the edge of the paper plate. Make sure the holes are spaced evenly, about an inch apart. This will allow for easy lacing.
Step 3: Cut the Yarn or Fabric Strips
If you’re using yarn, cut a long piece, about 2-3 feet. If using fabric or gauze, tear long strips about 1-2 inches wide. The length can vary, but it should be long enough to wrap around the plate multiple times.
Step 4: Start Lacing
Begin lacing from the back of the plate. Thread the yarn or fabric through a hole and pull it to the front, creating a start point for your wrap.
Step 5: Wrap Your Mummy
Wrap the yarn or fabric around the paper plate to resemble mummy wrappings. Go in and out through the holes as you wrap. You can switch direction or go back the other way for a more haphazard mummy look.
Step 6: Leave a Space for Eyes
Make sure to leave a space at the top of the plate where you will attach the googly eyes. Continue wrapping until you have covered the majority of the plate, and then secure the yarn or fabric at the back with glue and a knot if necessary.
Step 7: Attach the Googly Eyes
Once your wrapping is complete and secured, take the googly eyes and glue them onto your mummy in the designated area. You can add more than two eyes for a silly effect if you wish!
Step 8: Add Extras (optional)
Using a black marker, draw a mouth or other details to enhance your mummy’s personality. You can also add colored paper shapes or other embellishments around the mummy.
TIPS AND TRICKS
- Choosing materials: Use what you have at home, like old t-shirts or leftover yarn. This makes it easy to personalize the project.
- Cutting fabric: If cutting fabric, use sharp scissors for straight edges and try to tear fabrics for an uneven look.
- Avoid common mistakes: Make sure the holes are evenly spaced and not too close to the edge, as this might tear the paper plate.
- Getting a better finish: Take your time when wrapping the yarn or fabric to ensure it’s not too tight, leading to tearing.
- Saving money: Use recyclable materials or scraps from previous crafts to keep costs low.
- Work safely: If you have younger crafters, supervise them when using scissors and glue.
VARIATIONS AND CUSTOMIZATION IDEAS
- Different colors: Use colored yarn instead of plain white to create colorful mummies.
- Different sizes: Create smaller mini mummies using smaller paper plates for a fun variation.
- Different materials: Use materials like twine, string, or even ribbon to create unique mummy wraps.
- Seasonal versions: Change the colors according to different holidays – for example, green for Halloween ghouls or red, white, and blue for Fourth of July.
- Different patterns: Experiment with different wrapping patterns, like stripes or a spiral.
- Personalized versions: Have kids decorate their mummies with names or personal touches.
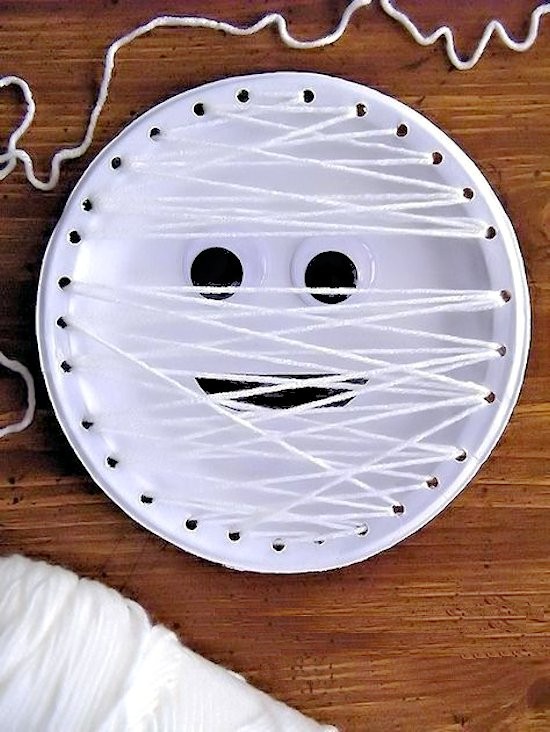
Mummy Paper Plate Lacing Craft FAQ
Q1: Is this craft suitable for younger children?
Yes! The Mummy Paper Plate Lacing Craft is ideal for children. However, adult supervision is recommended during steps involving scissors and glue.
Q2: How long does it take to complete the craft?
You can expect to spend about 30 minutes to an hour on this craft depending on your pace and whether you add additional embellishments.
Q3: What materials can I use if I don’t have yarn?
You can use old t-shirts, strips of muslin or fabric, or even string as alternatives to yarn for wrapping your mummies.
Q4: How should I store my mummies after crafting?
Store your mummies in a dry place away from direct sunlight. If possible, keep them in a box or container to avoid damage.
Q5: Can I use this craft idea for gift-making?
Absolutely! These mummies can serve as cute handmade gifts for friends or can be a colorful addition to Halloween treat bags.
CONCLUSION
The Mummy Paper Plate Lacing Craft is a fun and simple project that brings a touch of spooky creativity into your home. With easy-to-understand steps and readily available materials, it’s an excellent way for beginners to delve into the world of crafting. This budget-friendly DIY is not only quick to make but also allows for endless customization, ensuring that every mummy created will be unique. So gather your materials and bring these adorable mummies to life. We can’t wait to hear about your crafting experience or see the finished projects you create!