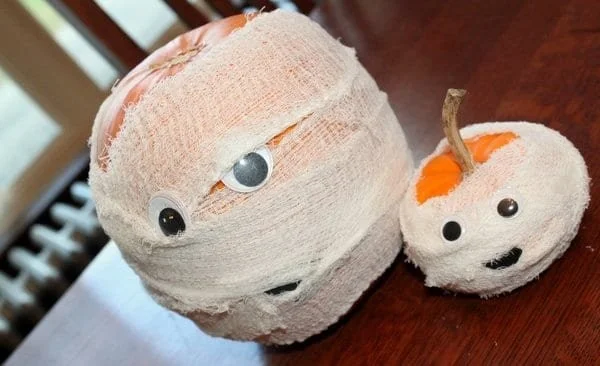
The Family of Pumpkin Mummies is a fantastic DIY craft project that brings a spooky yet playful touch to any home during the fall season. This simple craft is perfect for beginners and utilizes a few inexpensive materials, making it a budget-friendly choice for seasonal decor. On top of that, it yields delightful and unique homemade decorations that raise the Halloween spirit in your home.
WHY YOU WILL LOVE THIS Family of Pumpkin Mummies
Creating your very own Family of Pumpkin Mummies is an enjoyable and satisfying experience. This DIY project is not only straightforward, making it easy for beginners, but it also requires minimal materials that you may already have at home. Here are some benefits you’ll appreciate:
- Easy for Beginners: This craft is simple, requiring no special skills. Anyone can create their own pumpkin mummies!
- Uses Simple Materials: With just a few materials, you can easily make a whole family of mummies.
- Budget-Friendly: The costs are low, making it a great choice for those wanting to save money while creating decorations.
- Quick to Make: You can whip these up in about an hour or less, perfect for a last-minute decoration.
- Great for Home Decor: These mummies look adorable and add a fun vibe to your home.
- Seasonal Decorating: Get your home ready for Halloween with this seasonal craft that fits right into the festive atmosphere.
- Easy to Customize: You can get creative with colors, sizes, and facial expressions for each mummy, making them unique to your style.
PROJECT DETAILS
Here’s a quick overview of the essential details for the Family of Pumpkin Mummies project.
Skill Level
Beginner – This craft is perfect for people who are new to DIY projects.
Estimated Time
About 45 minutes to 1 hour – This allows ample time for crafting and letting any glue dry.
Approximate Cost
Around $10 – This project uses inexpensive materials, making it budget-friendly.
Best For
Home decor, Halloween parties, or seasonal decorating – This craft suits various occasions.
Project Type
DIY project – A fun at-home crafting activity to do alone or with family and friends.
TOOLS AND EQUIPMENT NEEDED
You don’t need many tools for this project, and they are easy to handle.
Hot Glue Gun
A hot glue gun is pivotal for quickly attaching materials together. Ensure you have glue sticks on hand as well.
Scissors
A pair of good quality scissors will help you cut the gauze fabric accurately.
Ruler
Using a ruler can help measure the gauze to ensure all pieces are of uniform size, especially for smaller pumpkins.
MATERIALS
Below are the materials you will need to complete the Family of Pumpkin Mummies.
Gauze Roll
You will need approximately 4 yards of gauze roll. This acts as the mummy’s wrapping and gives it a spooky look.
Googly Eyes
You’ll need one roll of googly eyes. These eyes add character to your pumpkin mummies and give them a fun, animated expression.
Black Sticky Back Foam or Black Construction Paper
This material allows you to create the mouth for your mummies. It’s easy to cut and stick, giving your mummies a classic mummy look.
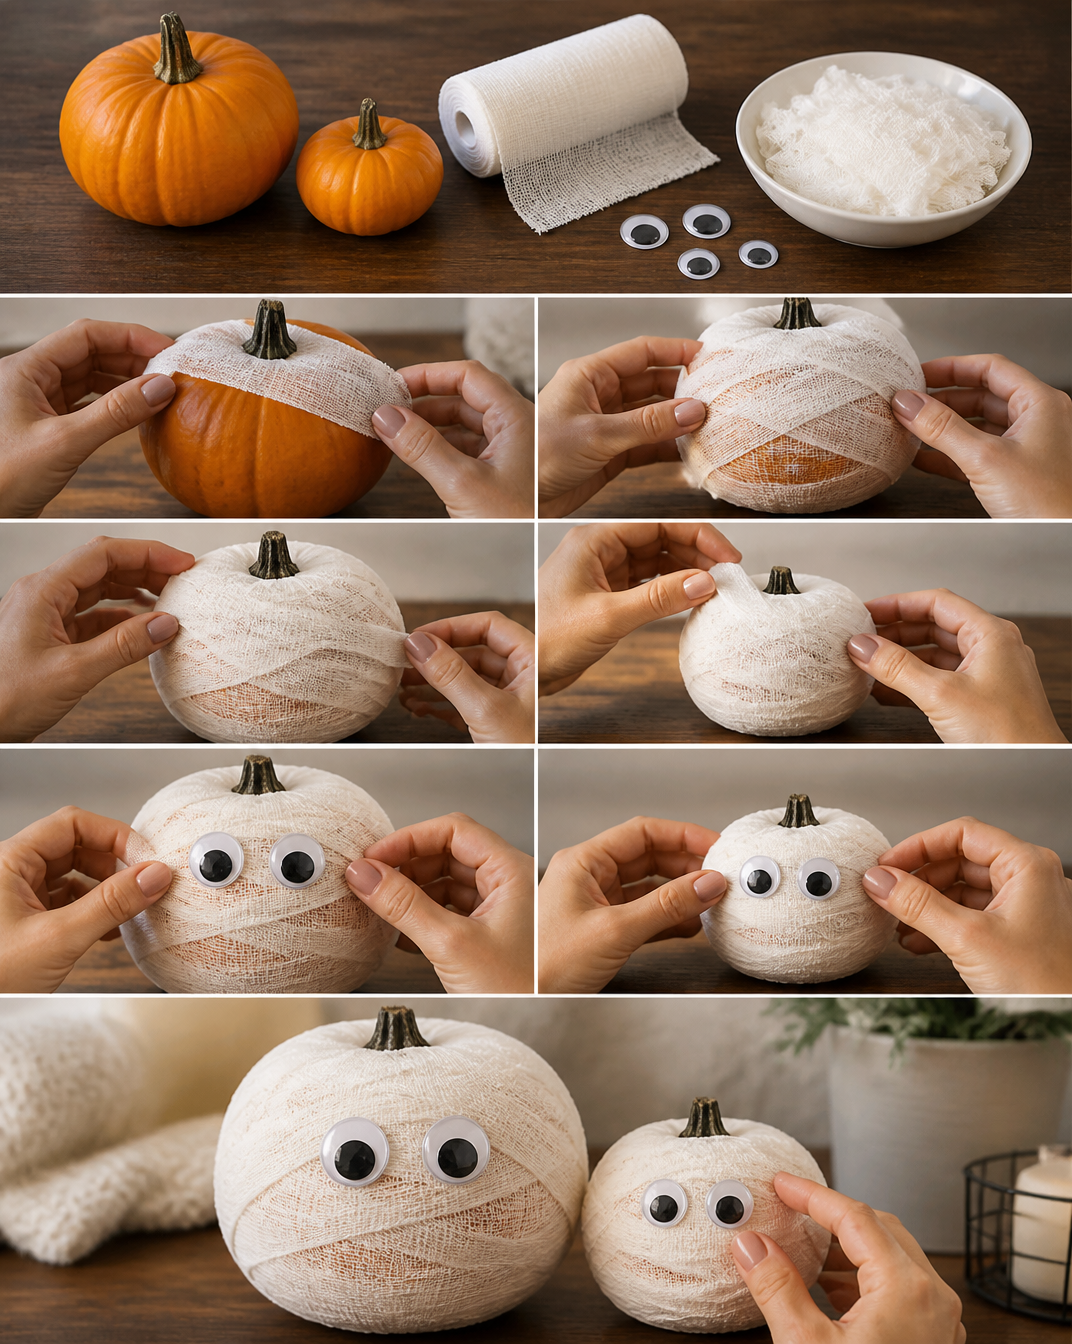
HOW TO MAKE Family of Pumpkin Mummies
Ready to bring your pumpkin mummies to life? Follow these simple instructions to create your Family of Pumpkin Mummies.
Step 1: Prepare the Gauze
Cut the gauze in half lengthwise. If you are using smaller pumpkins, consider cutting it in half again to make thinner strips. This allows you to wrap the gauze around your pumpkins more easily.
Step 2: Attach the Gauze
Using your hot glue gun, apply a small amount of glue to one end of the gauze and attach it to the back of the pumpkin. This will hold your gauze in place as you wrap it.
Step 3: Wrap the Pumpkin
Carefully wrap the gauze around the pumpkin. Make sure to cover the surface well, but don’t worry about it being too neat — a little haphazardness adds character!
Step 4: Secure the Gauze
When you reach the other end, hot glue the gauze to the back of the pumpkin, or simply tuck it in to keep it secure. For smaller pumpkins, it’s advisable to apply hot glue a few times while wrapping.
Step 5: Attach the Googly Eyes
Take your googly eyes and hot glue them onto the front of the pumpkin, tucking them under a piece of gauze for a peeking effect. This adds charm to your mummy!
Step 6: Create the Mouth
Cut a shape from the black sticky foam or black construction paper to create the mouth. You can make it a straight line or a fun expressive mouth! Stick it on your mummy and cut a small triangle shape if you want a protruding tooth. If you completely cover the mouth with gauze, consider cutting a little slit to create an interesting effect.
TIPS AND TRICKS
Here are some practical tips to help you successfully complete your Family of Pumpkin Mummies:
- Choosing Materials: Pick a gauze that is flexible and easy to work with. Thicker gauze can be more challenging to maneuver.
- Cutting the Gauze: Use sharp scissors for a clean cut. If you cut jaggedly, it can add to the character of the mummy.
- Getting a Better Finish: If the gauze looks too messy, you can always trim stray pieces or unravel sections for a more polished look.
- Saving Money: Look for gauze rolls at the dollar store or craft store sales to keep your costs low.
- Making the Craft Last Longer: Store your pumpkin mummies in a cool, dry place to prevent any wear and tear.
- Working Safely: Be cautious when using the hot glue gun. The glue can become very hot and may cause burns.
VARIATIONS AND CUSTOMIZATION IDEAS
There are endless possibilities when it comes to customizing your pumpkin mummies! Here are some ideas to consider:
- Different Colors: Use colored gauze or even paint the pumpkins to create a unique look.
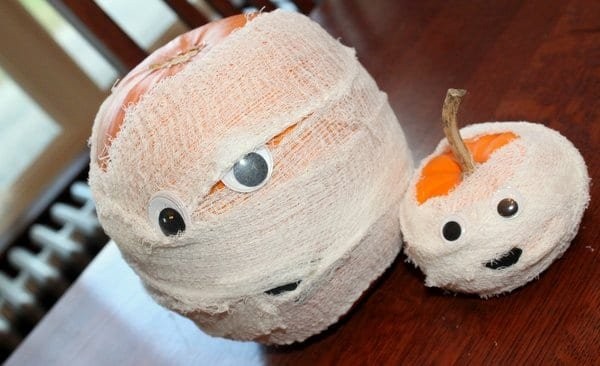
- Different Sizes: Experiment with different pumpkin sizes to create a whole mummy family ranging from large to small.
- Themed Versions: Adapt the mummies for other holidays by using different colors and shapes.
- Personalized Versions: Add names or initials on the mummies using small pieces of foam or ribbon for a customized touch.
- Create a Scene: Add mini props like ghosts or cute bats to enhance your Halloween scene.
- Seasonal Versions: You can change the theme for other seasons by using holiday colors and decorations.
Family of Pumpkin Mummies FAQ
What is the difficulty level of this craft?
This craft is beginner-friendly and easy to make, which makes it perfect for people new to DIY projects.
What materials do I need for the pumpkin mummies?
You will need 4 yards of gauze roll, a roll of googly eyes, and black sticky back foam or black construction paper for the mouth.
How long does it take to make this craft?
You can complete the Family of Pumpkin Mummies in about 45 minutes to 1 hour, depending on how many pumpkins you make.
How can I store my pumpkin mummies?
Keep your pumpkin mummies in a cool, dry place to maintain their appearance. You can use plastic storage bins to shield them from dust and damage.
Can I customize the mummies?
Yes! You can customize your pumpkin mummies in various ways, including changing colors, sizes, and facial expressions to suit your preferences.
CONCLUSION
The Family of Pumpkin Mummies is an easy and creative DIY project that anyone can complete with minimal effort. It’s an excellent way to add festive decor to your home and makes for great handmade gifts or personal projects. With totally customizable options and low costs, this is a fun and budget-friendly seasonal craft.
Give this craft a try! We encourage you to share your experience or any creative twists you add while making your own Family of Pumpkin Mummies. Happy crafting!