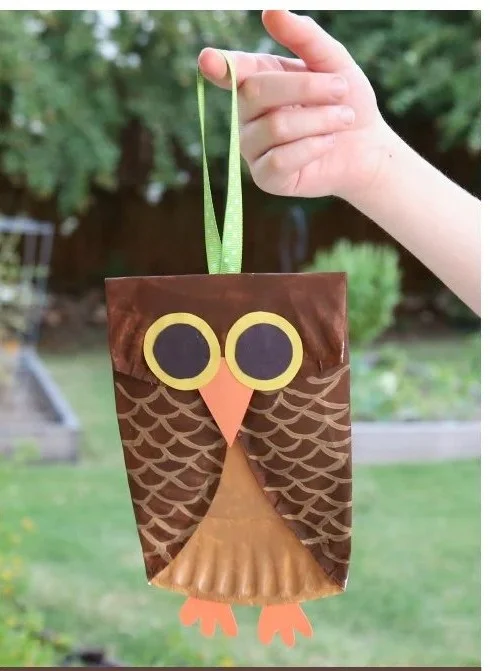
Looking for an easy craft idea that brings some fun and creativity into your home? The Paper Plate Owl Craft for Kids is an excellent choice! This simple DIY project not only engages children with a fun activity, but it also enhances their fine motor skills and creativity. An ideal combination of adorable and educational, this craft utilizes everyday materials found at home, making it a budget-friendly addition to your craft routine.
In this article, you will find step-by-step instructions to create these charming paper plate owls, tips for customizing the designs, and ideas for using them as decorations or gifts. So, gather your materials and let’s dive into this creative DIY project!
WHY YOU WILL LOVE THIS Paper Plate Owl Craft
Making a Paper Plate Owl Craft is a delightful experience for both kids and adults. Here are some reasons why you will love this beginner-friendly craft:
- Easy for Beginners: The steps are straightforward, making it easy for craft novices to follow along.
- Uses Simple Materials: You don’t need to buy fancy supplies; most materials are likely already available at home.
- Budget-Friendly: A fantastic option for families looking for economical craft ideas.
- Quick to Make: This craft can be completed in about 30 minutes, perfect for busy schedules.
- Great for Home Decor: The finished owls can brighten up your living space with cute and colorful decorative options.
- Customizable: Encourage creativity by allowing variations in colors and designs.
- Suitable for Seasonal Decorating: These owls can be themed for different holidays, making them versatile all year round.
PROJECT DETAILS
Skill Level
Beginner-friendly. This craft is suitable for children and is easily guided by adults.
Estimated Time
Approximately 30 minutes. Quick enough to keep attention without feeling rushed!
Approximate Cost
Less than $10. Most materials can be sourced from your craft bin or the local dollar store.
Best For
Kids, families, classroom activities, or birthday parties.
Project Type
DIY home decor, seasonal crafts, or handmade gifts.
TOOLS AND EQUIPMENT NEEDED
Scissors
Used for cutting the paper plates and other craft materials into desired shapes.
Glue
An essential tool for sticking all the materials together securely. You can use liquid glue, glue sticks, or even tape.
Marker or Crayons
Used for drawing features like eyes and beaks, or for coloring the plates to make your owl designs unique.
MATERIALS
Paper Plates
These serve as the base for your owls. You can use standard-sized or mini paper plates depending on the size you want to achieve.
Colored Construction Paper
Great for making vibrant wings, beaks, and other features of the owl.
Googly Eyes
These add fun to the owl face and can be glued directly to the paper plate for an animated look.
Feathers (optional)
If you want to add a textured feel, feathers can be glued onto the wings for an extra pop of creativity.
Pipe Cleaners (optional)
These can be used for decoration or to create fun owl feet.
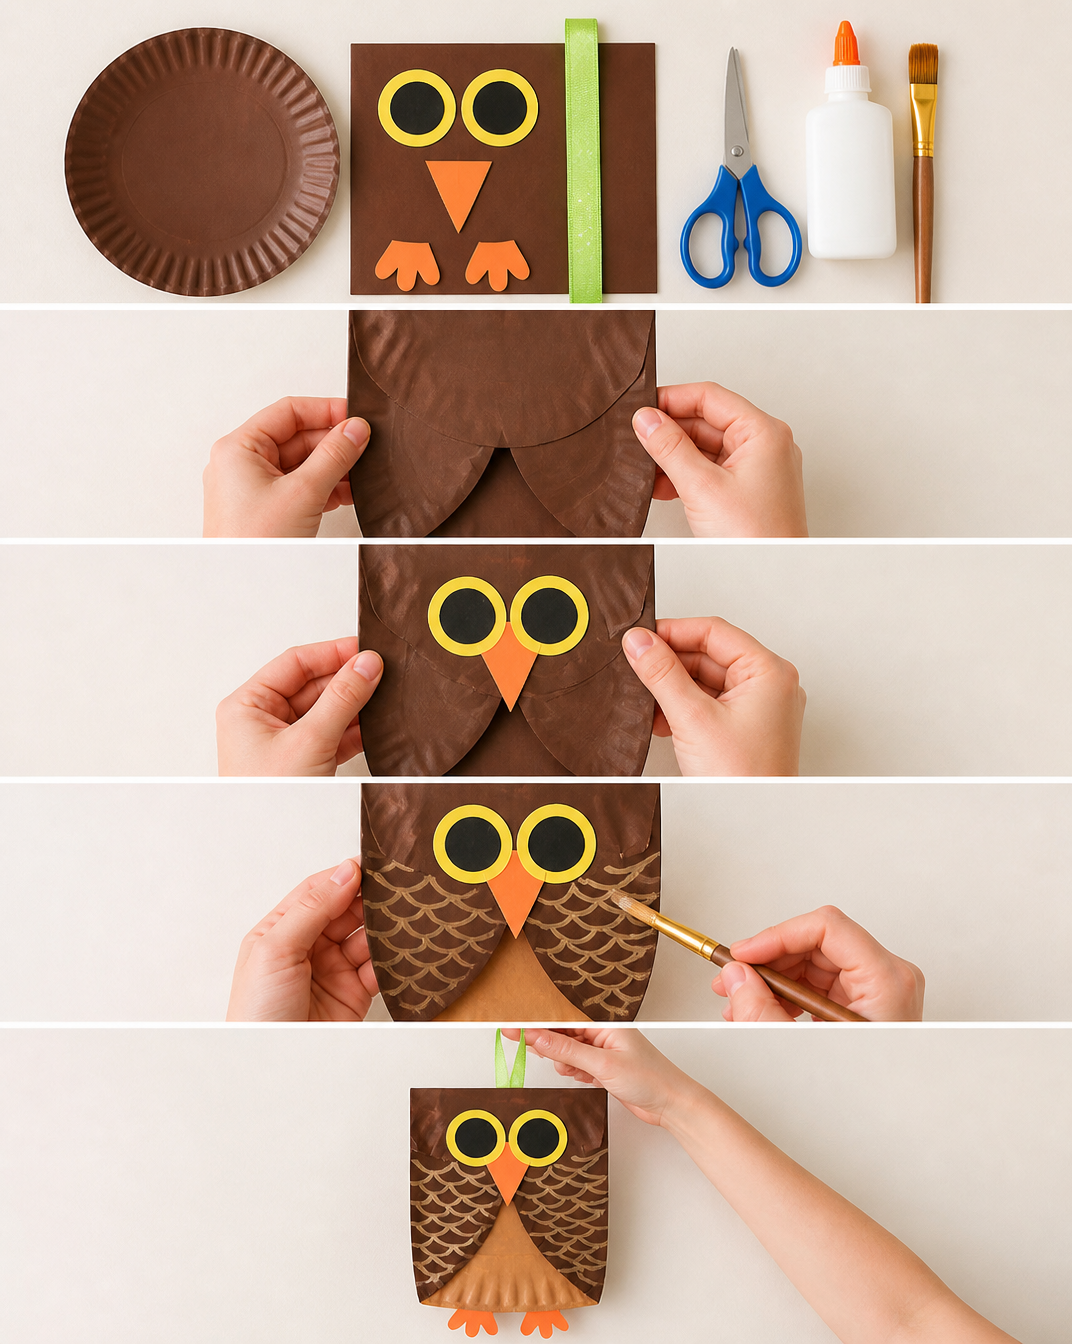
HOW TO MAKE Paper Plate Owl Craft
Follow these simple steps to create your very own paper plate owl. This craft is fun and easy, making it a great activity for kids!
Step 1: Prepare the Paper Plates
Start by selecting your paper plates. If you’re using standard-sized plates, you can turn one upside down for the owl’s face and another for the wings. If using smaller plates, decide how you want to arrange them.
Step 2: Color Your Plates
Use markers or crayons to color the plates. You might want to make the face a light color and the wings a darker shade. Be generous with your colors—this owl should be as vibrant as possible!
Step 3: Create Owl Features
From the colored construction paper, cut out shapes for the owl’s eyes, beak, and wings. For simplicity, you can create circular eye shapes and a small triangle for the beak. For wings, you can cut half-oval shapes that complement the size of your paper plates.
Step 4: Assemble the Face
Glue the googly eyes onto your owl’s face. Next, attach the beak below the eyes. Once these features are in place, the face will start to come together.
Step 5: Attach the Wings
Using glue, attach the wings to either side of the paper plate to create the owl’s body. Ensure they are firmly pressed down to keep them securely in place.
Step 6: Add Extra Features
If using feathers or pipe cleaners, now is the time to decorate! You might want to glue feathers onto the wings or use pipe cleaners for cute little feet.
Step 7: Display Your Creation
Once everything is dry and securely attached, your Paper Plate Owl Craft is ready for display! You can hang it on a wall, place it on a table, or even give it as a handmade gift.
TIPS AND TRICKS
- Choosing Materials: Opt for bright colors when selecting construction paper to make your owl stand out. Use recycled materials whenever possible for a more eco-friendly approach.
- Cutting and Gluing: Cut materials slowly to ensure safe handling and neat edges. When applying glue, use a small amount to avoid messiness.
- Avoid Common Mistakes: Make sure to allow glue to dry fully before hanging or displaying your craft to maintain its structure.
- Making the Craft Easier: If you’re working with younger kids, consider pre-cutting the shapes and letting them focus on gluing and coloring.
- Saving Money: Buy supplies in bulk or next to nothing from dollar stores for a more cost-effective crafting session.
- Durability: For longer-lasting crafts, consider sealing the finished piece with a light coat of clear sealant spray.
- Working Safely: Always supervise children with scissors and glue to ensure safe crafting.
VARIATIONS AND CUSTOMIZATION IDEAS
Feel free to get creative with your Paper Plate Owl Craft! Here are some fun customization ideas:
- Different Colors: Use different color schemes for different owl species. For example, purples and blues for a whimsical touch or browns and greens for a more natural look.
- Different Sizes: Combine different sizes of paper plates to create a family of owls in various sizes—from baby owls to parent owls.
- Seasonal Versions: Decorate your owl according to the season! Add snowflakes for winter, flowers for spring, or autumn leaves for fall.
- Personalized Versions: Let kids add their names or initials on their owls to personalize their crafts.
- Different Patterns: Explore various patterns like polka dots or stripes using washi tape or paint for an exciting twist.
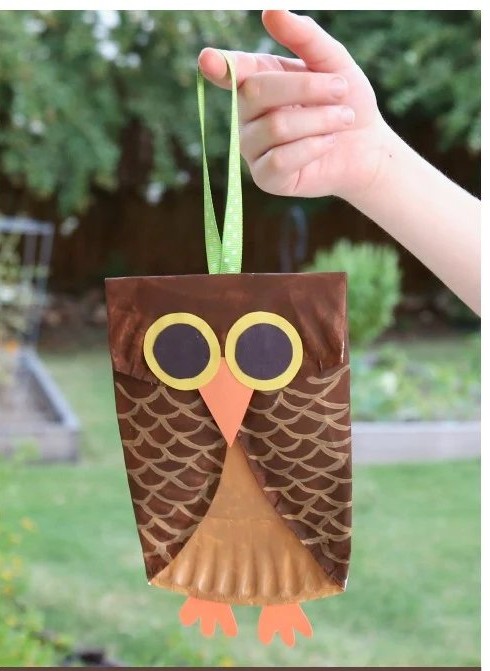
Paper Plate Owl Craft FAQ
How difficult is this Paper Plate Owl Craft?
It’s a beginner-friendly craft that can be done with minimal adult supervision, making it perfect for children and first-time crafters.
What materials do I need for this project?
Basic materials include paper plates, colored construction paper, glue, and googly eyes. Optional items include feathers and pipe cleaners.
How should I store my finished owls?
For best results, display them in a cool, dry area. Avoid direct sunlight to prevent fading and deterioration.
How durable are these owl crafts?
If properly constructed and displayed, these crafts can last for months. However, keep them away from moisture to maintain their appearance.
Can I make these owls for a specific holiday?
Absolutely! Customize your owls with seasonal colors and decorations to match any holiday theme, whether it’s Halloween, Christmas, or Fall.
CONCLUSION
The Paper Plate Owl Craft for Kids offers a simple yet enjoyable experience for crafters of all ages. This easy DIY project not only helps develop creativity but also encourages bonding time between kids and adults. With minimal materials and steps, it becomes a budget-friendly option for family fun, home decor, or gifting.
We hope you give this craft a try and explore the customization ideas available. Don’t forget to share your finished owl and any new design ideas you come up with! Happy crafting!