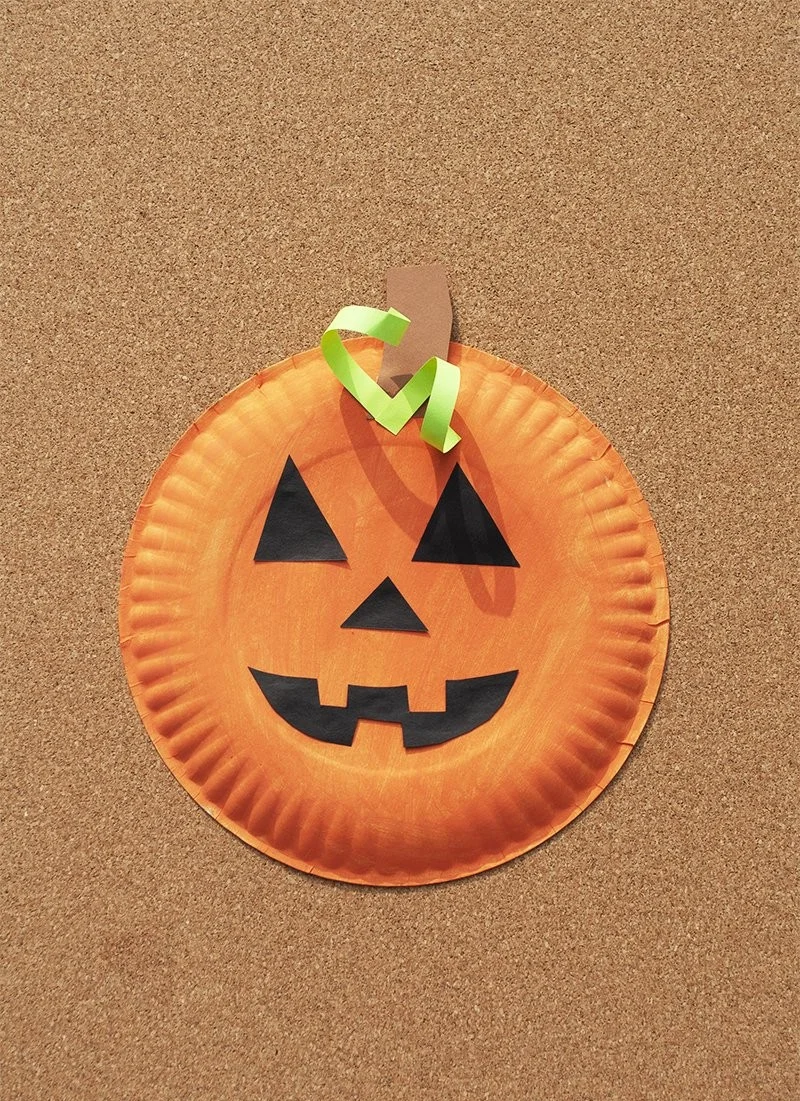
If you are looking for an easy DIY project for the fall season, the Paper Plate Pumpkin Craft is an excellent choice. This seasonal craft is perfect for all ages, making it a fantastic activity for families, teachers, or anyone who loves to create. Using simple materials that you likely already have on hand, this budget-friendly craft can quickly transform a plain paper plate into a delightful pumpkin decoration. Great as a piece of homemade decor or as part of a holiday celebration, this creative DIY idea offers endless possibilities for customization.
WHY YOU WILL LOVE THIS Paper Plate Pumpkin Craft
The Paper Plate Pumpkin Craft is loved by many for its simplicity and charm. Here are some reasons why you will enjoy making this craft:
- Easy for Beginners: This craft is perfect for those new to DIY projects, as it doesn’t require advanced skills or tools.
- Uses Simple Materials: All the materials needed for this craft are easy to find and inexpensive.
- Budget-Friendly: With affordable materials, this project is ideal for anyone looking to create without breaking the bank.
- Quick to Make: You can complete this craft in about an hour, making it a great option for busy schedules.
- Great for Home Decor: This pumpkin can be displayed during the fall season, adding a festive touch to your home decor.
- Easy to Customize: You can personalize your pumpkin craft with different colors, sizes, and features, making each piece unique.
PROJECT DETAILS
Skill Level
This project is suitable for all skill levels, making it a great beginner-friendly craft.
Estimated Time
Expect to spend about 30 to 60 minutes creating your paper plate pumpkin, depending on drying times and customization.
Approximate Cost
The cost for this craft is minimal, typically around $5 to $10, depending on the materials you already have at home.
Best For
This craft is perfect for families, classrooms, or anyone looking for budget-friendly Halloween decor.
Project Type
This project falls under seasonal crafts, handmade gifts, and easy crafts for adults.
TOOLS AND EQUIPMENT NEEDED
Scissors
Scissors are essential for cutting out shapes from various construction paper. Ensure they are sharp for clean cuts, especially around intricate designs.
Paintbrushes
Paintbrushes are used to apply orange paint to the paper plate. Having different sizes can help with coverage and detail.
Glue
Glue is necessary for attaching all parts of the pumpkin together, from the facial features to the stem and leaves.
MATERIALS
Paper Plate
The base of your pumpkin craft, the paper plate will be painted orange to resemble a pumpkin’s surface.
Orange Paint
This paint will give your pumpkin its vibrant color. Use acrylic or washable paint for easy clean-up.
Black Construction Paper
Black construction paper is used to create the pumpkin’s facial features, such as eyes, nose, and mouth.
Green Construction Paper
Green construction paper will be used to make leaves for the pumpkin, adding a fresh touch to your creation.
Brown Construction Paper
The brown construction paper forms the stem of the pumpkin and gives it a natural look.
Pen or Pencil
A pen or pencil will help you trace shapes on the construction paper before cutting them out, ensuring accuracy.
HOW TO MAKE Paper Plate Pumpkin Craft
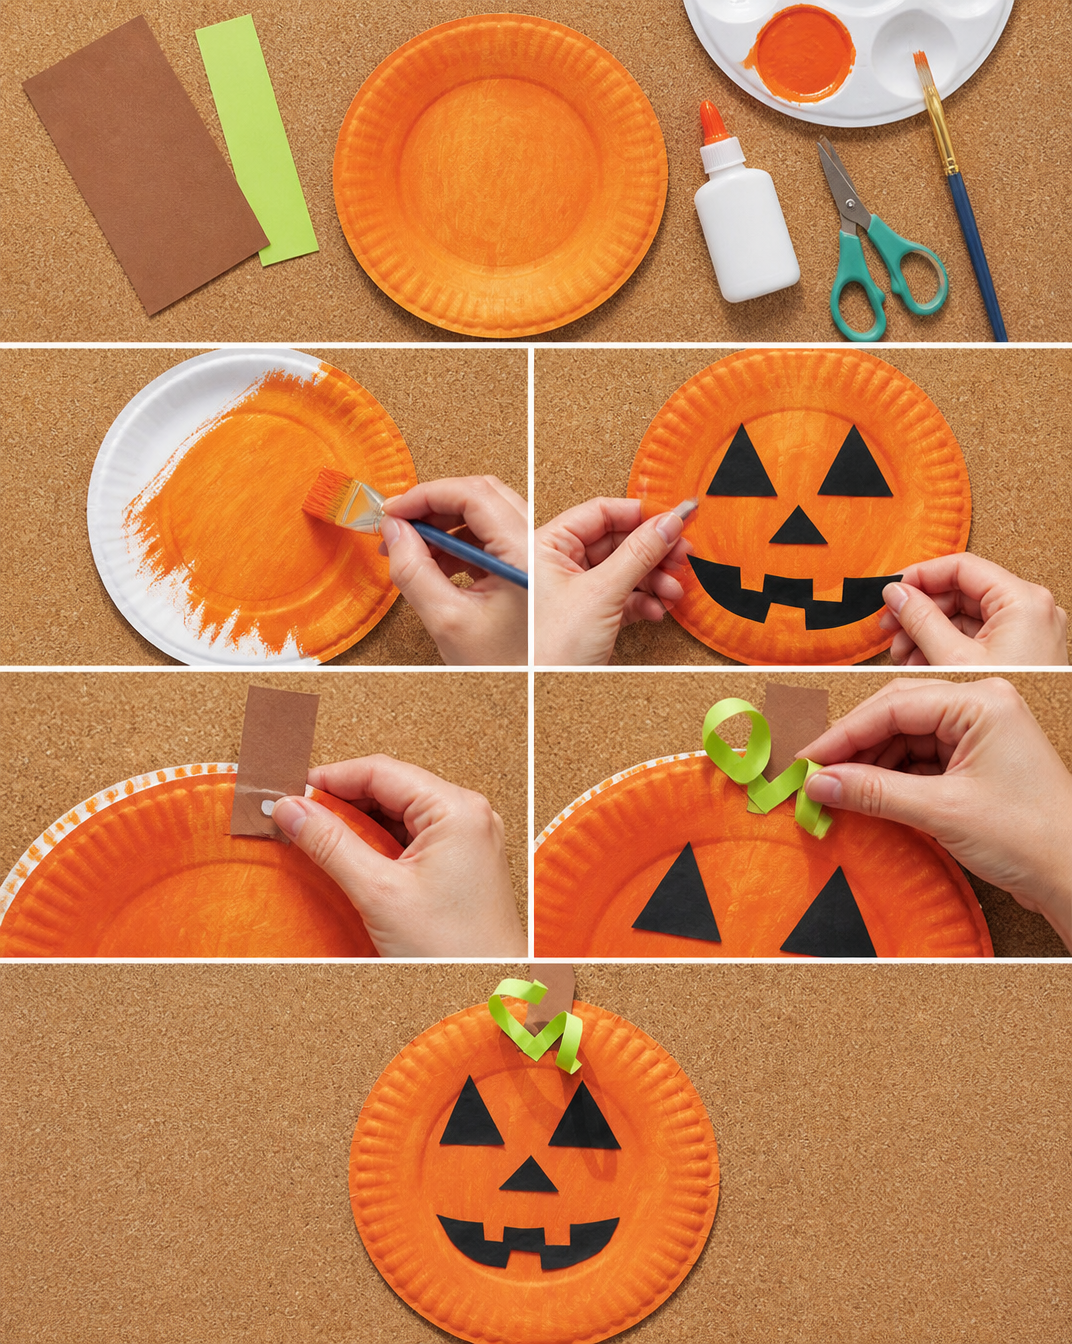
Step 1: Paint the Paper Plate
Begin by painting the entire paper plate orange. Use a paintbrush to apply a thin layer of paint, allowing it to dry completely. If needed, add a second coat for a more vibrant color.
Step 2: Cut Out Facial Features
While the paint is drying, take the black construction paper and cut out shapes for the pumpkin’s eyes, nose, and mouth. Triangular eyes and a simple smile work well for a classic pumpkin look.
Step 3: Curl Green Strips
Next, cut narrow strips from the green construction paper. To create a curly effect for the leaves, wrap these strips around a pen or your finger. This will add a fun, whimsical touch to your pumpkin craft.
Step 4: Glue on Facial Features
Once the orange paint is completely dry, start attaching the black facial features to your pumpkin. Use glue to secure the eyes, nose, and mouth in their desired positions.
Step 5: Attach the Stem and Leaves
Finally, take the brown construction paper and cut out a small rectangle to serve as the stem. Glue it to the top of the pumpkin. Then, add the curled green leaves by gluing them to the sides of the pumpkin to complete your craft.
TIPS AND TRICKS
- Choosing Materials: When picking construction paper, opt for vibrant colors to make your craft stand out.
- Cutting Tips: Use sharp scissors for clean cuts, especially when cutting facial features.
- Avoid Common Mistakes: Ensure the paint is completely dry before gluing on features to prevent them from sliding or smudging.
- Get a Better Finish: If you want a glossy appearance, consider adding a coat of Mod Podge after the paint dries.
- Working Safely: Ensure children are supervised when using scissors and glue to avoid accidents.
VARIATIONS AND CUSTOMIZATION IDEAS
- Different Colors: Use shades like yellow or green for a unique pumpkin or even create a jack-o’-lantern with different colors.
- Different Sizes: Experiment with different-sized plates to make a variety of pumpkins.
- Seasonal Versions: Add seasonal elements like ghosts or other fall decorations for an autumn-themed craft.
- Holiday Versions: Incorporate other festive themes by adding decorations related to Halloween or Thanksgiving.
- Personalized Versions: Use letters or initials on the pumpkins to personalize each creation for family or friends.
Paper Plate Pumpkin Craft FAQ
1. Is this project difficult for beginners?
No, this project is very beginner-friendly. It uses simple materials and steps that anyone can follow.
2. What materials do I need for the Paper Plate Pumpkin Craft?
You will need a paper plate, orange paint, black, green, and brown construction paper, scissors, and glue.
3. How long does it take to complete this craft?
The estimated time for this project is around 30 to 60 minutes, depending on the drying time of the paint.
4. How can I store my finished pumpkin craft?
To keep your pumpkin looking fresh, store it in a cool, dry place. Avoid exposure to moisture to prevent damage.
5. Can I clean the pumpkin after creating it?
This craft is fairly durable; however, avoid using water or cleaning products. Instead, lightly dust it with a dry cloth if needed.
CONCLUSION
The Paper Plate Pumpkin Craft is an easy, budget-friendly DIY project perfect for seasonal decorating or as a simple crafts for beginners. With minimal supplies and quick steps, you can create a delightful pumpkin that adds a festive flair to your home. Whether using it for Halloween or just to enjoy the fall season, this craft inspires creativity and fun.
Try out this easy craft idea, and don’t hesitate to share your experience, finished project, or customization ideas with your friends and family! Happy crafting!